Merry Christmas, Happy Festivus, Happy Hanukah, Happy New Year, Happy Day, Happy Life! It's been a while since my last blog post, and for that I say, "You're welcome." When I created this blog, I did so as a way to share photo-tips and interesting photo-venture stories. I wanted to avoid turning this into a daily journal on days when I'm not having fun with photos. Fortunately, my studies as a Master's Student in vocal performance at the University of Nevada, Las Vegas have allowed me to nurture my artistic needs while precluding me from going on as many photo-adventures.
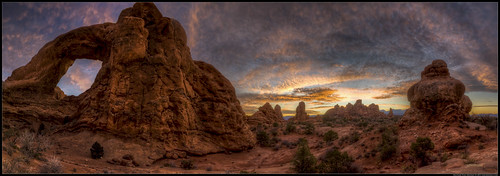
Eden Giving Rise, originally uploaded by navandale.
Via Flickr:Eden Giving Rise, originally uploaded by navandale.
Sunrise on Thanksgiving Morning in the Garden of Eden in Arches Naitonal Park near Moab, Utah. This is a seldom photographed view of the popular South Window Arch and the eastern-most part of the rock formations that make up the Garden of Eden. I was quite thankful to get this glorious sunrise, as the last time I was here the sky was not nearly as interesting.
I've decided that I quite enjoy visiting National Parks on holidays, because not nearly as many people are present. Although, I did run into a few people after I packed up and headed toward my car. My family always has Thanksgiving dinner the day after Thanksgiving, letting me take advantage of uncrowded national parks and still share in feasting!
The reason this view is rarely photographed is because it covers a 180 degree field of view from southeast to northwest. This is a panoramic image created from 10 vertical HDR frames. Each HDR frame was created from 3 RAW images using Photomatix Pro and Photoshop CS4.
How I did it:
First of all, I had my typical gear: Canon 40D, Tamron 18-250, Manfrotto carbon fiber/magnesium alloy tripod. I was shooting at a bracket of (0, -2, +2), f18, ISO200. I balanced my exposure to the clouds in the sky, rather than the foreground, giving me a midtone exposure of 1/6 second, so my bracketed exposures were (1/6, 1/25, 0.6).
WHEN SHOOTING FOR A PANORAMA, keep in mind the basic rules of composition:
1) Have something interesting in the foreground. Here it's the doughboy-shaped rock formation and the arch;
2) Capture more sky if the sky is interesting, and more ground if the ground is interesting (in this case, both were interesting);
3) Align the horizon and avoid unwanted objects (litter, fences, cars, people, etc.);
4) Generally use a wide enough aperture for wide angle nature shots (f18-22), and a narrow enough aperture for better depth-of-field with zoomed focal lengths (f2-5.6).
5) Compose enough of the scene to allow for cropping after the panorama is created (The photomerge process will usually distort the image a little, making cropping necessary);
5a) Avoid unnecessary negative space (cloudless sky, desolate/monotonous/boring landscape)
6) Overlap wide-angle frames by at least 1/2 to compensate for lens distortion, and zoomed frames by at least 1/3
7) Compensate for changing exposure values over a large scene by finding the midtones of the entire scene (when bracketing for HDR images, also make sure that your images sufficiently expose the highlights of clouds and foliage... sometimes that means taking 6 exposures to capture all of the highlight detail).
8) ALWAYS USE YOUR TRIPOD... and a decent one. I've seen enough people try to set up their SLRs on those 12" snaking tripods... you've seen em in camera stores and airports. They're a waste of money. Go ahead and spend the extra $20-30 on a sturdy tripod that stands at least a few feet tall... and use it! Sturdiness is key when capturing beautiful landscape images.
 |
| Generally, a good HDR landscape histogram will look like this |
BUT WAIT, now that we're zoomed in to 100%, we might be able to see all sorts of anomalies and eyesores: Noise in the sky, fringed edges, and weird color variances from frame to frame.
It used to frustrate me when I would complete an hdr image, only to discover that there was weird green and red fringing around the highlight edges. I would take the HDR into Adobe RAW, knowing that there is a defringe option under the lens calibration menu. unfortunately, this option would not help, and I'd be left to either accept the fringed edges, scrap the photo, or try to somehow manually fix the edges.
I have tried all options, and none of them seemed very just. There must be a way.
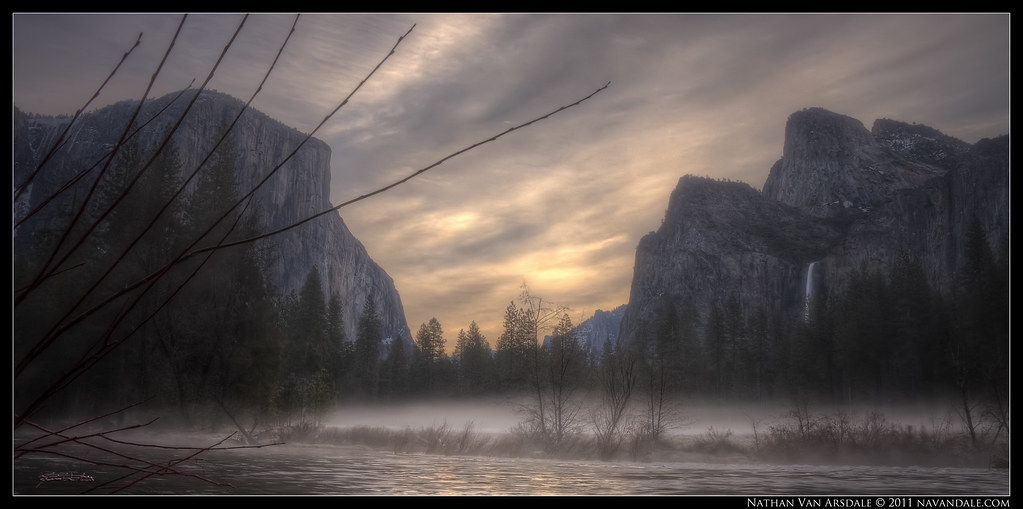
Luckily, the answer came to me when I noticed that the white balance was different from bracketed image to image in one of my bracketed sets. So, I opened the RAW images in Adobe RAW to adjust the white balance. In this sunrise image taken in Yosemite National Park, the sky was much warmer, but the camera read the white balance as cooler. The quick fix was to set the white balance for all 3 images to "Shade" and then make minor adjustments to the Temperature and Tint sliders.
Then, I zoomed in to 100%, and this is what I saw:
 Those terribly fringes edges weren't a byproduct of the HDR process after all! I could fix them in camera RAW before merging them into an HDR image. So, Under the Lens Corrections Menu I selected "Defringe>All edges."
 That fixed a lot of the problem, but I still noticed some weird color fringing on the edges, so I took the matter into my own hands. The colored fringe is a byproduct of light wrapping around an edge. If the edge is facing the light source, it will be more red, if it is facing away from the light source, it will be more cyan. So, I moved the Red/Cyan fringe slider to -33, and fixed the fringe problem on all RAW images. I then saved the images as TIFF files, and merged those files using Photomatix Pro.
The image below show the adjustments I made in Photomatix Pro. Pay close attention to the histogram... notice how I don't sacrifice any shadow detail or highlight detail. I do this by adjusting the Strength, Luminosity, and White Point/Black Point sliders. Each image is different, so I rarely use the same settings. Though, generally, I won't take the strength over 90 or below 70, won't move the saturation from the 48-50 area, and won't lower the luminosity by too much. The Microcontrast and Smoothing are usually set to 10. Gamma is always at 1.00 (usually). The preview is usually different from the processed HDR, due to the computer's ability to render a 32 bit image. That's why it's important to pay close attention to the histogram.

I save the HDR as a 32 bit TIFF. If it's a frame for a larger pano, I process all of the frames under the same settings (sometimes I will process parts of the scene with different settings to get to a truer-to-life representation of colors and levels... but that takes a lot of time and patience). After the photomerge I edit the HDR image in RAW, and in photoshop (typical edits almost always include in this order: cropping, spot-removal, levels balancing/contrast adjustment, sharpening, noise-removal).
Once I get the image to where I like it, I save it as a 16 bit TIFF. Then I add my signature via a brush that I created from a photo of my signature (don't know how? It's easy... google it), and save that as a separate TIFF file, then as a jpeg. Then I put my border around the image and save it as a separate file. The reason for so many files: website display, printing, re-touching, and archiving.

Happy Holidays! Thanks for reading!
For prints, visit my printshop.


No comments:
Post a Comment