 |
| The Confluence of the Colorado River and Green River in Canyonlands National Park, Utah. |
The Journey
I was heading back to Las Vegas from Colorado, where I left my car while I was in Hawaii to avoid baking in the desert, and was planning on stopping in Canyonlands for a day or so, as is my modus operandi. My intention was to capture a time-lapse series of the night sky over the canyons, and continue to Vegas. I was quite successful in capturing the night sky at False Kiva (That will be a supplemental post). The next day, however, my reason for returning to Vegas, a client who booked a portrait shoot, called and cancelled. So I was faced with the decision to keep going to Vegas, or head down south to the Needles section of Canyonlands and explore new territory. I looked at my map and saw that I could hike to the confluence of the Colorado and Green Rivers, or hike inside the Needles. Both places looked pretty cool as per my google image search, but the Confluence was the only place I knew I could have an interesting foreground facing west, so I planned my route and went. Vegas could wait an extra day.According to what I read, the hike to the Confluence overlook was 10-miles round trip. It was a clear, hot day. My car thermometer read 107. But I had plenty of water, food, and first aid... I had a feeling it would be a great day of rugged beauty.

I stopped by the ranger station and informed the ranger on duty of my plans. He made sure that I knew there wasn't much cover on the hike to the confluence, which I did. It was early in the afternoon, and I figured it would take me about an hour to an hour-and-a-half to hike the 5-miles. That would leave me plenty of time to explore the rim and set up the best angles.
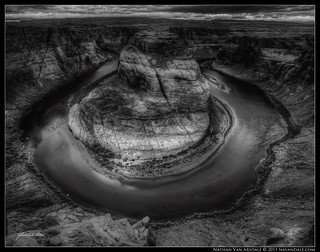 |
| Horse Shoe Bend, Page, AZ |
Getting There
I arrived at the Confluence Overlook at about 5:00... about an hour and a half from my time of departure, but I still had about 3-hours before sunset. After checking the time on my phone I turned my phone back off to save battery. The overlook didn't offer much in the way of interesting compositions. So, I hiked around the area looking for better compositions, careful not to hike on the cryptobiotic crust. During my scouting I came across a couple of sound-capturing devices mounted on tripods. I could only imagine what types of sounds they recorded. I thought of this article that a friend shared with me about the sounds of different habitats over time. Very cool stuff.I found the perfect spot. A flat area of rock a little south of the overlook had a great view of the confluence and the bend in the joined rivers. In order to fit this tight scene from that angle, I would have to use my 15mm Canon fisheye and photograph a panorama. I set up my camera and tripod and took some test shots. A couple of clouds had formed in the sky creating shade from the hot sun. It was a relief.
Satisfied with my composition, I covered my camera, stashed my gear under a rock overhang, and laid down for a little nap (camel backs make great pillows!). I still had about three hours until sunset, and I was kind of beat. I must have slept for a couple of hours, very comfortably I might add, when I was woken up with rain dropping on my face. Nothing heavy, just big fat drops here and there, but the sky was filled with thick clouds, and I could see sheets of lightning and hear rumbling thunder. I enjoyed the refreshing coolness of the rain for a moment before taking shelter under the rock overhang along with my gear.
The Storm
The rain picked up and became a deluge. I was completely dry under the five-foot overhang of sandstone that created a natural shelter. Fortunately for me, the wind was coming from behind the my alcove. The rain turned into hail, and lightning was striking very near behind me. I decided to put everything metal from my pockets in my camera bag, just in case. It was quite the show... although I was a little worried that the wind might knock over my tripod. I watched my camera, fifty yards away over boulders, exposed on the ledge of a cliff, covered in protective rain gear, sitting steady on its tripod, and internally kicked myself for not grabbing it and bringing it to the shelter with me.As fast as it started, the hail let up to light rain. The clouds continued on, and blue sky showed above me. I watched the storm blow across the canyon, like a heavy metal concert in the sky. I had no idea what time it was, or how long I had slept. So, reflexively I pulled out my phone, which had been off most of the hike, and turned it on to check the time.
That's when I knew I was being struck by lighting.
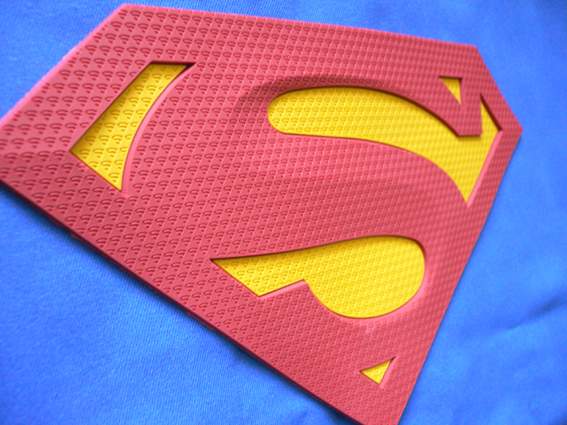
 |
| This photo from a few years ago was taken by Fred Morlege (photofm). I reprocessed it to make it look a little more "electric" |
The air suddenly felt very warm and still. My arm hairs stood on end, and I could smell the electricity.
Suddenly, a tremendous noise, as though from inside me, boomed as a power chord played on an over-amped bass guitar through an arena-sized subwoofer. I was lifted off the ground... just a little jump, I'm not sure if from being startled, or from the concussion of air the sound made, but inside my torso felt like I was experiencing a few G's... like riding a roller coaster.
From my phone danced a white spark like a foot-long flame that traveled down my arm and through my body. Everything flashed white!
It smelled kind of like metal tastes.
Immediately I turned off my phone and crouched underneath my overhang, quick to put my phone back in my camera bag. I smiled out at the storm and replied, "Got the message... no phones."
The storm continued on. I watched as it settled over the land on the other side of the canyon, and the sun started to dip below its far edge on the horizon. I started to get excited. This was going to be an AMAZING sunset!
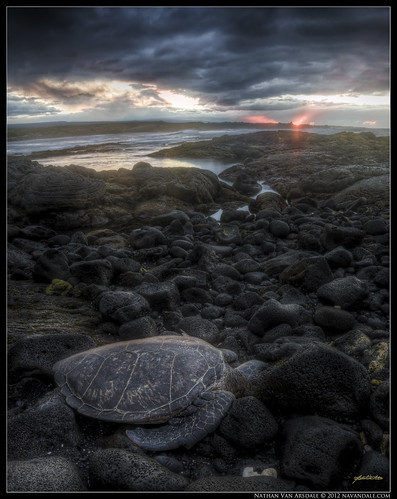
 |
| I've photographed lightning before, but was unable to get any this time. This is a scene from Graz, Austria. |
I have often mentioned my enjoyment of the music of nature. This sunset was one of the best songs ever! Everything was in harmony: powerful, gentle, water, rock, sky, red, blue... this was a gift!
Gratefully, and cautiously, I stepped out of my alcove and headed down the rocks to my camera. It was INCREDIBLY windy! Behind me another set of storm clouds were a few miles away, but moving in.
Bathed in Light
Then the sun broke through and illuminated just the ledge I was standing on, and the wind died down. Everything was fresh, warm, and vibrant. I was bathed in light. I felt so much gratitude to be taking part in this beautiful portion of creation. The sun continued to move down and illuminate more of the ridge, including the overlook, which glowed red. |
| A view of Confluence Overlook, the confluence, Island in the Sky, and the sound-recorder. |
I was smiling so big by this time! "This is perfect," I thought, "Thank you!" Then, realizing the light wasn't only shining on the rocks, out loud I whispered, "Where's the rainbow?"
I ran on top of my shelter (about 20 feet of solid rock higher), and saw to the southeasteast the gift I was looking for. A double, very red rainbow. I laughed with joy, even as the wind returned in force. I was much more exposed up on top than I was twenty feet lower. So I hurriedly composed and captured a 7-frame panorama of the scene, and headed back down, where it was less windy, to capture more of the sunset.
The sun slowly slipped away, and the dusk crept softly in. The wind calmed, and the sky opened up to the northeast (the direction I would have to hike back). I collected my things and headed towards the trail. I walked as long as I could without turning on my headlamp, but eventually turned it on to make sure I was on the trail. The hike back didn't seem to take nearly as long as the hike out. The entire time, the storm stayed behind me and to my right, occasionally flashing and rumbling. Ahead was clear. The entire time, I was filled with gratitude for the gift of life, and the knowledge to never to fear.

Both my phone and myself are in top working order. Thanks for reading!
Be well!
If you like my work, please consider purchasing a print, puzzle, mousepad, or coffee mug. There are tons of beautiful print options at my printshop. Until the end of August, use the code BlueMoon to receive a 50% discount off all purchases of $25 or more.


